Body 9 - Table
Body 9 - Table
Description
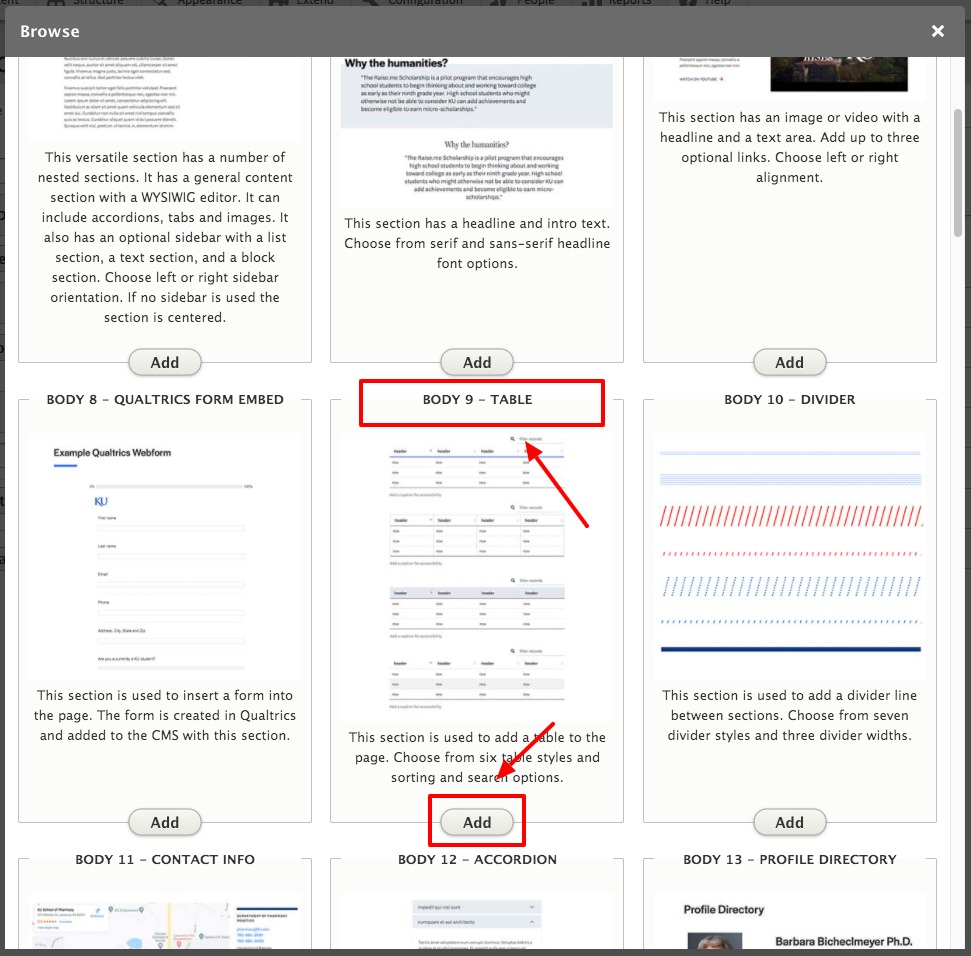
This section is used to add a table to the page. Choose from six table styles and sorting and search options.
Fields and Character Limits
*required fields
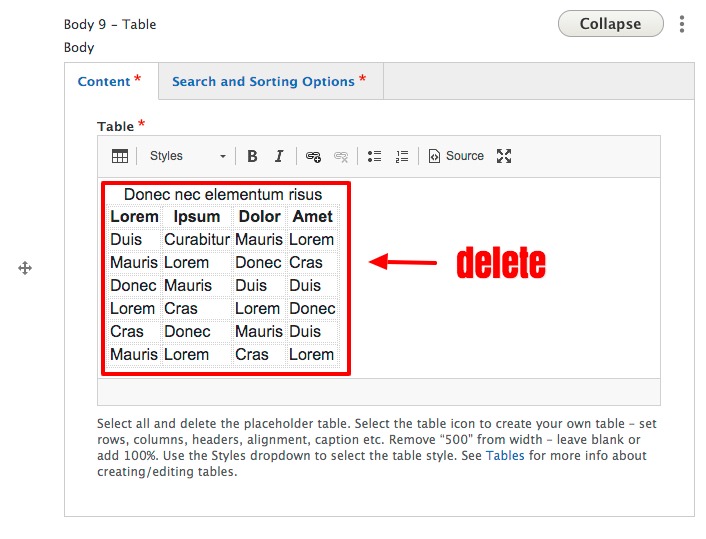
Table*
Help Text: Select all and delete the placeholder table. Select the table icon to create your own table – set rows, columns, headers, alignment, caption etc. Remove “500” from width – leave blank or add 100%. Use the Styles dropdown to select the table style. See Tables for more info about creating/editing tables.
Style and Search/Sort
Table Styles*
We strongly recommend using one of the following table styles on all tables.
- Basic Table
- Bordered Table
- Fog Header Table
- Lake Header Table
- Striped Table
Search and Sorting*
- Enable Search and Sorting: Yes/No
- Default Sort Order: Ascending/Descending
- Default Column Sort
- Pagination: Yes/No
- Show Number of Entries: Yes/No
- Search Placeholder Text
Where Can You Use This Section?
The section is available in the following templates and content types:
Templates
- Basic Content
- Basic + Content
Content types
- Content Page
- Kitchen Sink
Using on a cloneable Basic or Basic + Template
- Locate Body 9 - Table in the Body area
- Select Edit
- Select and delete the placeholder table
View ScreenshotSelect and delete the placeholder table - Select the Table icon in the WYSIWYG menu
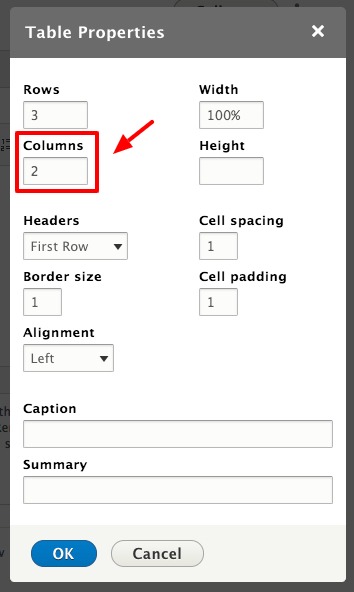
View ScreenshotSelect the Table icon in the WYSIWYG menu - Set the following table properties:
- Rows
View ScreenshotRows - Columns
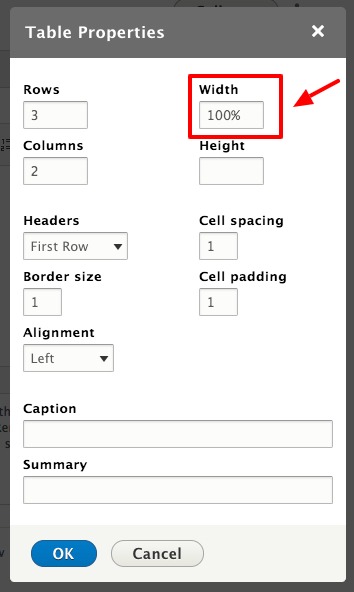
View ScreenshotColumns - Width – Delete the “500” and leave blank or add 100%
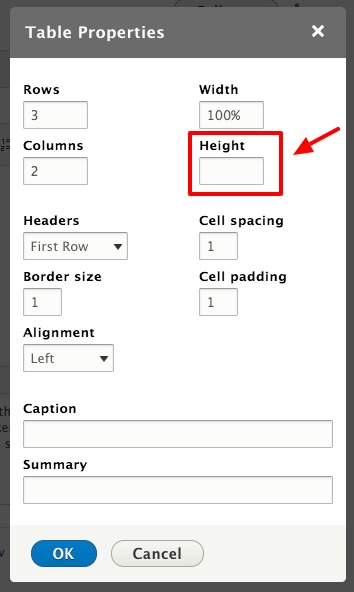
View ScreenshotWidth – Delete the “500” and leave blank or add 100% - Height – Leave blank
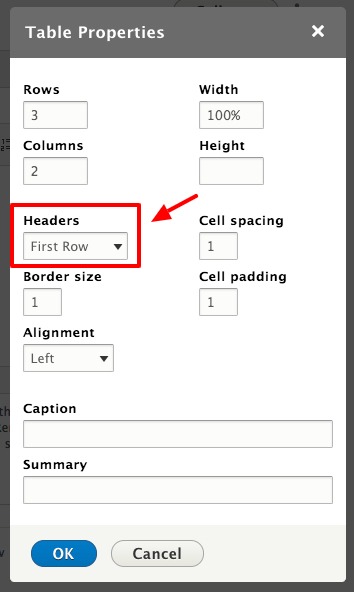
View ScreenshotHeight – Leave blank - Headers – Select location of headers
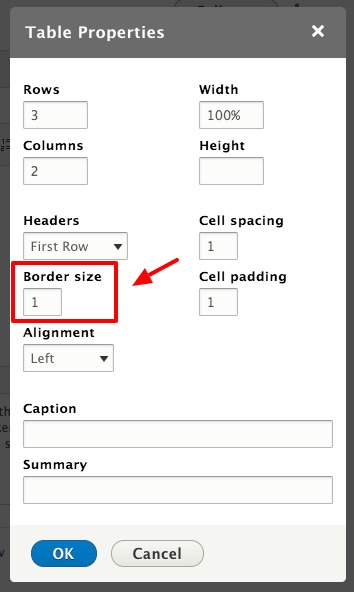
View ScreenshotHeaders – Select location of headers - Border size – Select border size for tables styles with borders
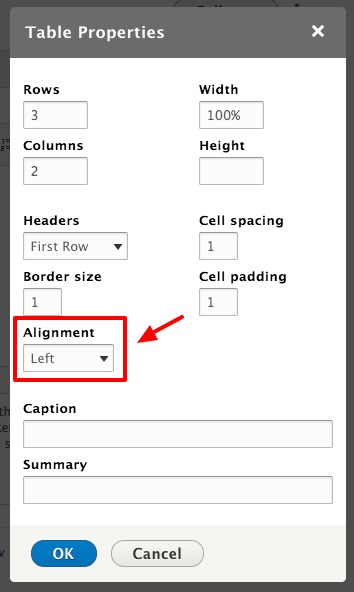
View ScreenshotAlignment – Select from left, center, and right - Alignment – Select from left, center, and right
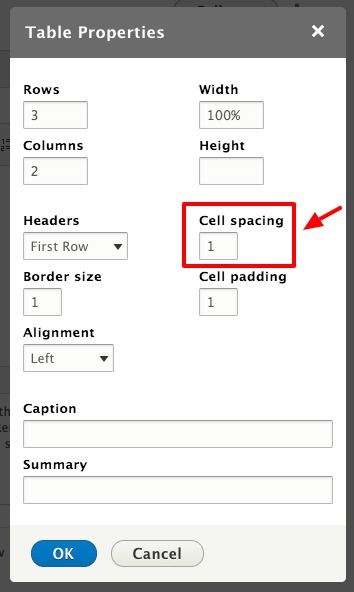
View ScreenshotAlignment – Select from left, center, and rightspan> - Cell spacing
View ScreenshotCell spacing - Cell padding
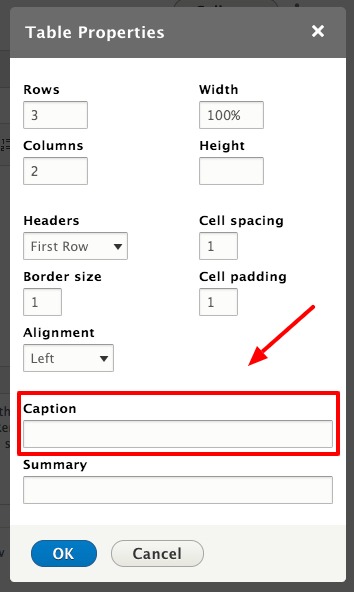
View ScreenshotCell padding - Caption – Add a caption for accessibility. Provides broad context for users accessing the page with a screen reader.
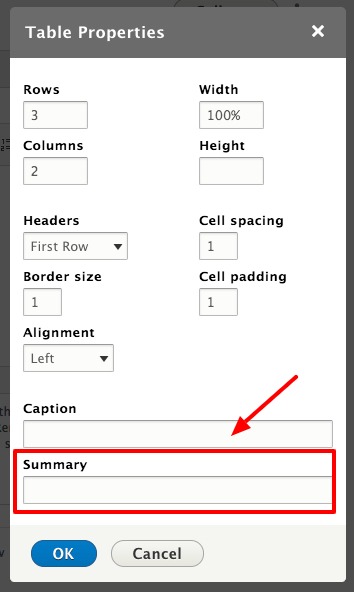
View ScreenshotCaption – Add a caption for accessibility. Provides broad context for users accessing the page with a screen reader.. - Summary – Add a summary for accessibility. Provides more detailed context for users accessing the page with a screen reader.
View ScreenshotSummary – Add a summary for accessibility. Provides more detailed context for users accessing the page with a screen reader.
- Rows
- Select OK
- Populate your table cells
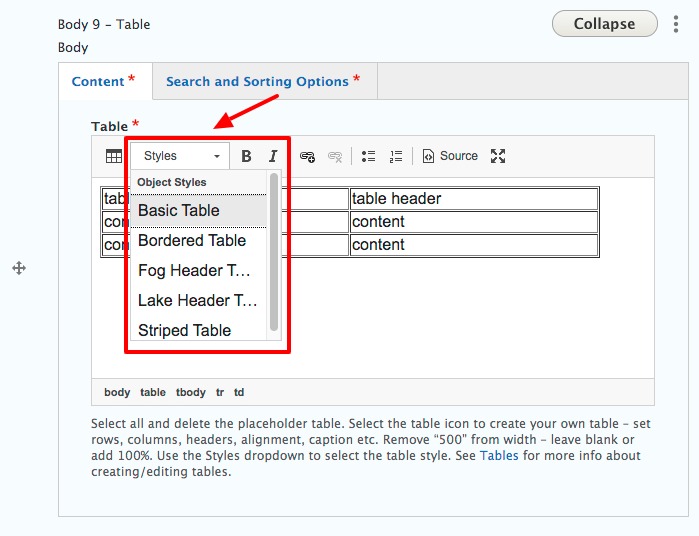
- From the Styles dropdown menu in the WYSIWYG menu, select a table style
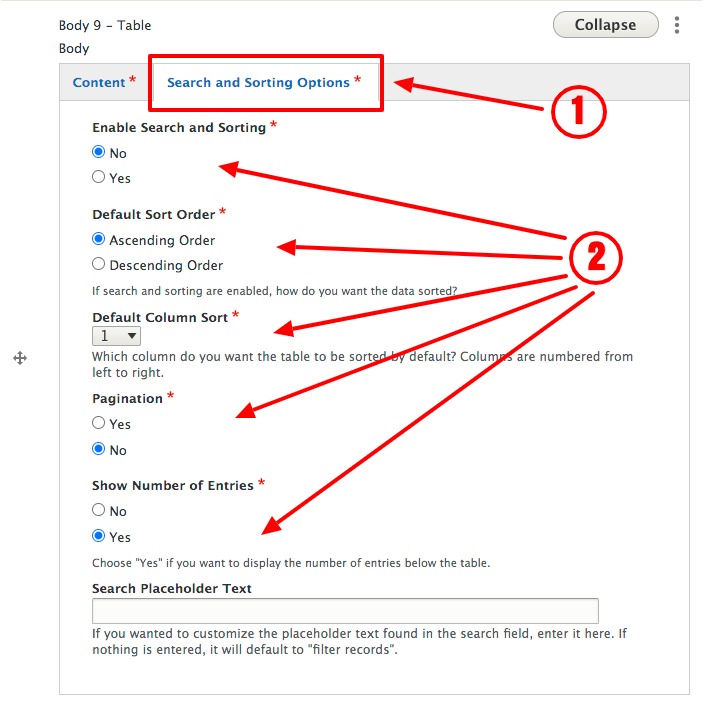
View ScreenshotFrom the Styles dropdown menu in the WYSIWYG menu, select a table style - From Style Options tab and select the search and sorting options
View ScreenshotFrom Style Options tab and select the search and sorting options - Select Save at the bottom left of the page
Adding to a new Content Page
- In the Body area, select Add Body Section
- Select Body 9 – Table, select Add
View ScreenshotSelect Body 9 – Table, select Add - Select and delete the placeholder table
View ScreenshotSelect and delete the placeholder table - Select the Table icon in the WYSIWYG menu
View ScreenshotSelect the Table icon in the WYSIWYG menu - Set the following table properties:
- Rows
View ScreenshotRows - Columns
View ScreenshotColumns - Width – Delete the “500” and leave blank or add 100%
View ScreenshotWidth – Delete the “500” and leave blank or add 100% - Height – Leave blank
View ScreenshotHeight – Leave blank - Headers – Select location of headers
View ScreenshotHeaders – Select location of headers - Border size – Select border size for tables styles with borders
View ScreenshotAlignment – Select from left, center, and right - Alignment – Select from left, center, and right
View ScreenshotAlignment – Select from left, center, and rightspan> - Cell spacing
View ScreenshotCell spacing - Cell padding
View ScreenshotCell padding - Caption – Add a caption for accessibility. Provides broad context for users accessing the page with a screen reader.
View ScreenshotCaption – Add a caption for accessibility. Provides broad context for users accessing the page with a screen reader.. - Summary – Add a summary for accessibility. Provides more detailed context for users accessing the page with a screen reader.
View ScreenshotSummary – Add a summary for accessibility. Provides more detailed context for users accessing the page with a screen reader.
- Rows
- From the Styles dropdown menu in the WYSIWYG menu, select a table style
View ScreenshotFrom the Styles dropdown menu in the WYSIWYG menu, select a table style - From Style Options tab and select the search and sorting options
View ScreenshotFrom Style Options tab and select the search and sorting options - Select either Save as Draft or Published with the drop-down menu
- Select Save at the bottom left of the form
Accessibility
- Caption – Add a caption to provide broad context for users accessing the page with a screen reader.
- Summary – Add a summary to provide more detailed context for users accessing the page with a screen reader.
- Avoid link text like Click Here, Learn More and More. See Links for more info, including accessibility concerns, examples and best practices.
Guidelines and Best Practices
- See Tables for more info about creating/editing tables.
Removing a Section
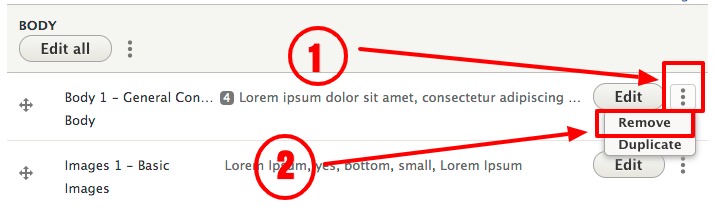
To permanently remove a section from a page:
- Select the vertical ellipsis to the right of the Edit button at the top-right of your section, select Remove
View ScreenshotSelect the vertical ellipsis to the right of the Edit button at the top-right of your section, select Remove - Select Save at the bottom left of the form